
The rhythmic click of the hook, the soft glide of yarn through your fingers, the slow emergence of something charming from a simple strand. There’s a unique magic in crochet. It’s more than just a hobby; it’s a portal to mindfulness, a canvas for creativity, and a source of pure, tangible joy. Whether you’re seeking a moment of calm after a hectic day, a creative spark, or the delight of making something utterly adorable with your own hands, crochet offers a warm embrace. And what better project to start (or continue) your journey than a delightful, clucking-good companion? Today, we’re diving beak-first into the wonderful world of amigurumi with a charming, accessible, and utterly free crochet chicken pattern designed for absolutely everyone.
Why Crochet is Your Perfect Creative Sanctuary
In our fast-paced, digital world, finding moments of true presence is precious. Crochet provides exactly that. The repetitive motions are inherently meditative, lowering stress hormones and inviting a sense of calm focus. It’s a tangible counterpoint to screens, grounding you in the here and now as you witness loops transform into stitches, and stitches blossom into form. It’s accessible – requiring minimal investment (just yarn, a hook, and maybe some stuffing!) – and portable, fitting into bags for crafting on the go. No wonder platforms like Instagram and Pinterest are overflowing with vibrant #crochet communities, showcasing everything from intricate lace to whimsical creatures like the one we’re making today. It’s a testament to the universal appeal of creating something beautiful, stitch by mindful stitch.
Meet Your New Feathered Friend: About This Free Crochet Chicken Pattern
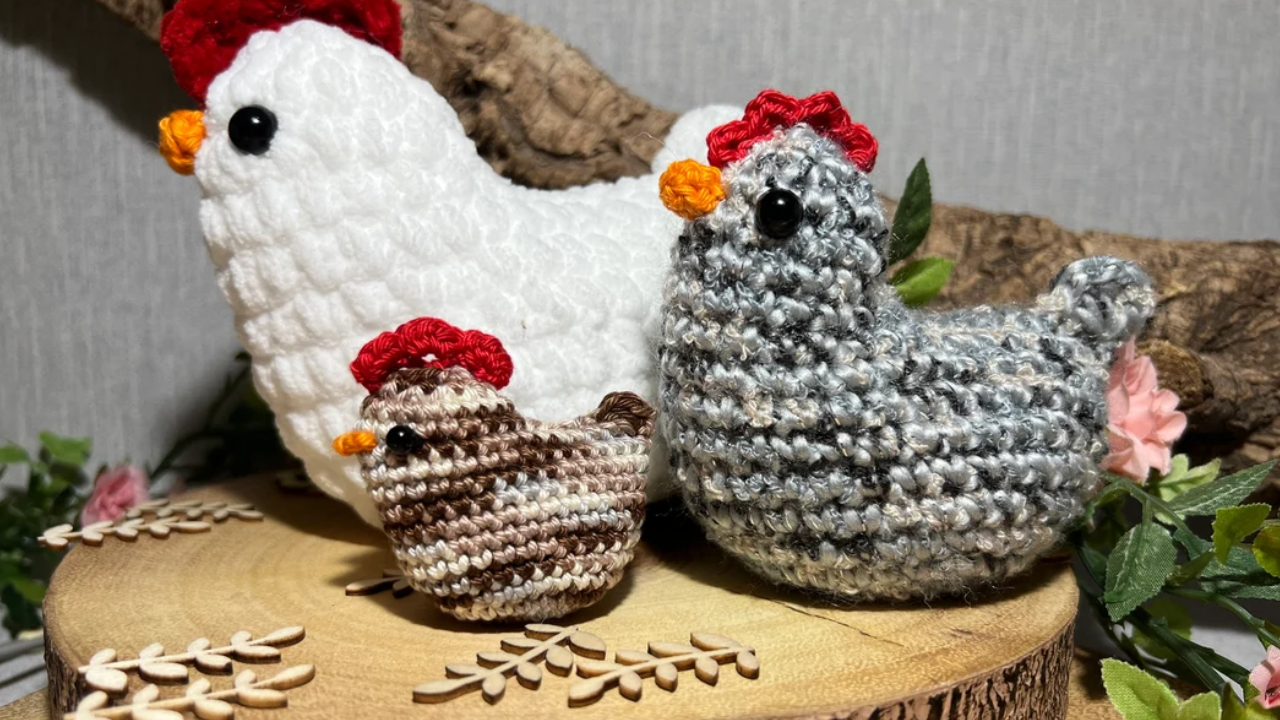
Imagine a plump, cheerful little chicken, standing proudly (or sitting cutely!) at about 3-4 inches tall. This pattern yields an utterly charming amigurumi chicken, perfect for a desk buddy, a nursery mobile, a keychain charm, or a sweet seasonal decoration. Its simple, rounded shapes and minimal color changes (often just two!) make it an ideal project. Beginners will appreciate the straightforward stitches (primarily single crochet worked in continuous rounds) and clear construction. Seasoned crafters will love the quick satisfaction – you can easily whip one up in an evening – and the endless potential for customization. This free crochet chicken pattern is truly designed to welcome all, proving that creating something adorable doesn’t require years of experience, just a little enthusiasm and yarn!
Let’s Get Stitching! Your Free Crochet Chicken Pattern
(Note: This is a conceptual overview of the pattern structure and key steps. For the complete, detailed written pattern with exact stitch counts and rounds, please CLICK HERE TO DOWNLOAD YOUR FREE CROCHET CHICKEN PATTERN PDF or visit [Your Blog’s Pattern Page Link].)
This free crochet chicken pattern uses basic amigurumi techniques worked primarily in continuous spiral rounds of single crochet (sc). Abbreviations (like sc, inc, dec) are standard and will be fully explained in the downloadable pattern.
Pattern Structure Overview:
- The Body (Starting from the Bottom):
- Begin with a magic ring (or chain 2, work sc into the first chain).
- Work increases in each round to form the rounded bottom.
- Work even rounds (sc in each stitch around) to build the height of the body.
- Begin decreases to shape the top of the body. STOP stuffing and closing when there’s a small opening left. Set aside.
- The Head:
- Similar construction to the body: start small, increase for roundness, work even rounds, then decrease towards the top.
- Before closing completely: Attach safety eyes (if using) between specific rounds. Refer to the pattern for exact placement – usually about 3-4 rounds down from the top decrease. Embroider eyes now if preferred.
- Stuff firmly and close the head. Do not fasten off yet if attaching directly to the body.
- Attaching Head to Body:
- Position the head opening onto the body opening. Using the yarn tail from the head and your yarn needle, whip stitch the head securely to the body. Weave in the end.
- The Comb:
- Using your accent color, chain a specific number.
- Work slip stitches (sl st) or single crochets back along the chain, possibly adding small increases/decreases to shape the little points of a rooster comb or a hen’s rounded comb. Sew onto the top of the head.
- The Beak:
- Small triangle shape: Chain a few, work decreases in subsequent rows to form the point. Alternatively, embroider a small “V” shape using accent color yarn or floss. Sew or embroider onto the front of the head, centered below the eyes.
- The Wattle:
- A tiny teardrop shape: Make a small oval or circle (e.g., magic ring, 4-6 sc, join, fasten off). Sew below the beak. Alternatively, embroider a small red dash or heart shape.
- The Wings (Make 2):
- Simple leaf or teardrop shapes: Work increases and then decreases in rows to form a flat, wing-like piece. Sew onto the sides of the body.
- The Legs/Feet (Make 2):
- Usually worked as simple tubes: Chain a few, join to form a ring, work sc in each stitch around for several rounds. Flatten slightly and sew to the bottom of the body. For more defined feet, the pattern might include a small 2-toed shape created with chains and slip stitches/sc.
Key Pattern Notes:
- Stuffing: Stuff firmly as you go, especially before openings get too small. Use small amounts at a time and push stuffing into corners (like the bottom) with the end of your hook or chopstick. Aim for a firm, plump feel – under-stuffing makes items floppy!
- Tension: Consistent tension is vital for even stitches and preventing holes where stuffing can peek through. Relax your hands! If stitches are too tight, size up your hook.
- Invisible Decrease (dec): This technique creates a smoother finish than a standard decrease. Instead of inserting the hook under both loops of the next two stitches (sc2tog), you insert hook under the front loop only of the next stitch, then under the front loop only of the following stitch, then complete the sc. The downloadable pattern will explain this clearly.
- Marking Rounds: Use a stitch marker! Move it up to the first stitch of each new round as you work. This prevents losing your place in the spiral.
- Weaving Ends: As you finish pieces, leave a 6-8 inch tail. Use your yarn needle to weave the end back and forth through nearby stitches in multiple directions before trimming close. This secures it firmly.
Avoiding Pitfalls: Troubleshooting & Tips for Success
Even the chirpiest chicken project can have a hiccup. Here’s how to avoid common clucks… er, clucks:
- Problem: My stitches are too tight, and it’s hard to insert the hook.
- Solution: Consciously relax your hands. Take breaks. Go up one hook size. Remember, tight stitches make stuffing difficult and can distort the shape.
- Problem: I see gaps/holes, and stuffing is showing.
- Solution: Check your tension – tight is good for amigurumi, but too tight can cause puckering and gaps. Ensure you’re working the correct stitch count each round (count often!). Use the invisible decrease method. Stuff more carefully, avoiding large clumps near the surface.
- Problem: My piece looks lopsided or misshapen.
- Solution: Count your stitches diligently every round! Missing an increase/decrease throws off the shape. Ensure consistent tension. Stuff evenly.
- Problem: I don’t understand the pattern abbreviations or instructions.
- Solution: The downloadable pattern will include a full abbreviation key. Don’t hesitate to search online for video tutorials on specific stitches (magic ring, invisible decrease, sewing pieces together). Many fantastic visual resources exist! (e.g., Link to a basic Magic Ring Tutorial on YouTube).
- Problem: Sewing pieces on is messy or uneven.
- Solution: Pin pieces in place first. Use the yarn tails whenever possible for sewing. Take small, neat stitches through both pieces. For symmetrical placement (like wings), measure or count stitches from a center point. Practice makes perfect!
Make it Your Own! Endless Customization Ideas
This free crochet chicken pattern is just the starting point! Unleash your creativity:
- Color Explosion: Ditch the traditional! Make rainbow chickens, pastel Easter chicks, gothic black hens, or roosters with vibrant blue bodies and fiery orange combs. Variegated yarn creates fun, unexpected effects.
- Accessorize: Give your chicken personality! Crochet a tiny flower for its head, a miniature scarf, or a saddle. Glue on a small magnet to make a fridge buddy.
- Seasonal Flair:
- Easter: Use pastel yarns, add a tiny crocheted Easter egg beside it, or make a whole clutch of chicks!
- Spring: Add crocheted flowers around its feet or a floral headband.
- Fall: Use warm browns, oranges, and reds; add a single crochet leaf.
- Winter: Make a tiny red scarf and a white “snow” base.
- Size Play: Use a larger hook and bulkier yarn for a bigger, cuddlier chicken, or a smaller hook and finer yarn (like DK or sport weight) for a delicate, detailed mini-chicken.
- Functional Fun:
- Keychain: Attach a keyring securely to the top before closing the head or through the back.
- Ornament: Add a hanging loop at the top.
- Pin/Brooch: Sew a pin back onto the bottom.
- Lovey: Attach a small crochet chicken to the corner of a baby blanket.
- Texture Twist: Use a fuzzy or tweed yarn for a unique feathered look (though it might be slightly trickier for beginners).
Why Crafters Are Clucking About This Pattern
This little chicken has hatched joy for so many! Here’s what fellow crafters are saying:
- “This was my first EVER amigurumi project! The pattern was so clear, and seeing my little chicken come to life gave me so much confidence. I’m hooked!” – Sarah J., Beginner Crocheter
- “I’ve made dozens of these chickens now – they’re my go-to quick gift! Teachers, neighbors, my book club… everyone adores them. The free crochet chicken pattern is just perfect.” – Maria L., Experienced Crafter & Gift-Giver
- “Perfect project for using up leftover yarn scraps. Each chicken has its own unique personality. My kids love choosing the colors!” – Ben T., Yarn Enthusiast & Parent
- “I sell these at my local craft fairs alongside my other items. They are always popular, especially around Easter and springtime. Such a cheerful little make!” – Chloe P., Etsy Seller
This pattern constantly pops up in crochet Facebook groups and Instagram feeds (#crocheted chicken, #amigurumi chicken), a testament to its enduring appeal and the satisfaction it brings. It’s a project that sparks smiles – both during the making and when sharing the finished feathered friend.
Sharing the Bounty: Gifting & Selling Your Crochet Chickens
These little chickens make wonderful gifts! They’re perfect for:
- Children: As a safe, soft toy (remember: embroider eyes for under 3s!).
- Teachers: A sweet “thank you” gift.
- Co-workers: A cheerful desk companion.
- Easter Baskets: A handmade alternative to chocolate.
- Hostess Gifts: Unique and personal.
- Just Because: Brightening someone’s day.
Thinking of Selling?
This is a common question! Since this is a free crochet chicken pattern, the ethical guidelines are generally favorable:
- Always Credit the Designer: Clearly state in your shop listing or at your craft fair table that the item was made using the “Free Crochet Chicken Pattern by [Your Blog Name/Designer Name]”. A simple link back is appreciated.
- Make it Your Own: While you can sell items made from the pattern, adding your own unique touches (special color combos, unique accessories) makes your product stand out and feel more distinctly yours.
- Check Specific Pattern Terms: While most free patterns allow for limited sales (like at local craft fairs or small online shops), always double-check if the specific pattern page states any restrictions. Reputable designers usually clarify this.
- Pricing: Factor in your time, material costs (yarn, stuffing, eyes), and any overhead. Amigurumi takes time! Don’t undervalue your skill. Small items like this chicken might sell in the $8-$20 range depending on size, materials, and detail.
- Be Realistic: Selling crafts requires effort beyond just making. Consider photography, listings, marketing, and customer service.
Conclusion: Hatch Your Creativity Today!
There you have it – your gateway to creating an utterly charming, joyful little crochet chicken! This free crochet chicken pattern truly embodies the accessible magic of crochet. It offers beginners a manageable, rewarding project and provides seasoned crafters with a delightful, quick make full of customization potential. Whether you’re seeking relaxation, a creative outlet, or a handmade gift brimming with love, this little feathered friend awaits.
So, gather your yarn, pick up your hook, and let the soothing rhythm of crochet wash over you. Embrace the simple joy of creating something uniquely yours, stitch by satisfying stitch. We can’t wait to see your flock of fabulous fowl!
❓ Frequently Asked Questions (FAQs)
- Q: Is this free crochet chicken pattern really suitable for absolute beginners?
- A: Absolutely! It uses only basic stitches (chain, single crochet, slip stitch) worked in simple shapes. The downloadable pattern includes detailed explanations and tips specifically for beginners. Take it slow, count your stitches, and don’t be afraid to undo a row if needed – it’s all part of the learning process!
- Q: Can I sell the chickens I make using this free pattern?
- A: Yes, generally you can sell items made from this free crochet chicken pattern. However, it’s good practice (and ethical) to credit the designer (e.g., “Made using the Free Crochet Chicken Pattern by [Your Blog Name]”). Avoid mass production. Adding your own unique customizations is encouraged! Always check the specific pattern page for any stated terms.
- Q: My stitches are very tight. What size hook should I use?
- A: If you naturally crochet tightly, try going up one hook size (e.g., from a G/6 to an H/8). This will give you more room to insert your hook and create slightly larger, more manageable stitches. Remember to make a small test piece (like the first few rounds of the body) to check your tension and stuffing visibility before committing to the whole chicken.
- Q: Where can I find more free crochet patterns like this?
- A: We have a growing library of free patterns right here on [Your Blog Name]! Explore our [Free Patterns Category Link]. Also, fantastic resources include Ravelry (use their advanced search for free patterns), AllFreeCrochet, Yarnspirations, and many talented designer blogs. Look for “beginner amigurumi” or “easy crochet animal” patterns.